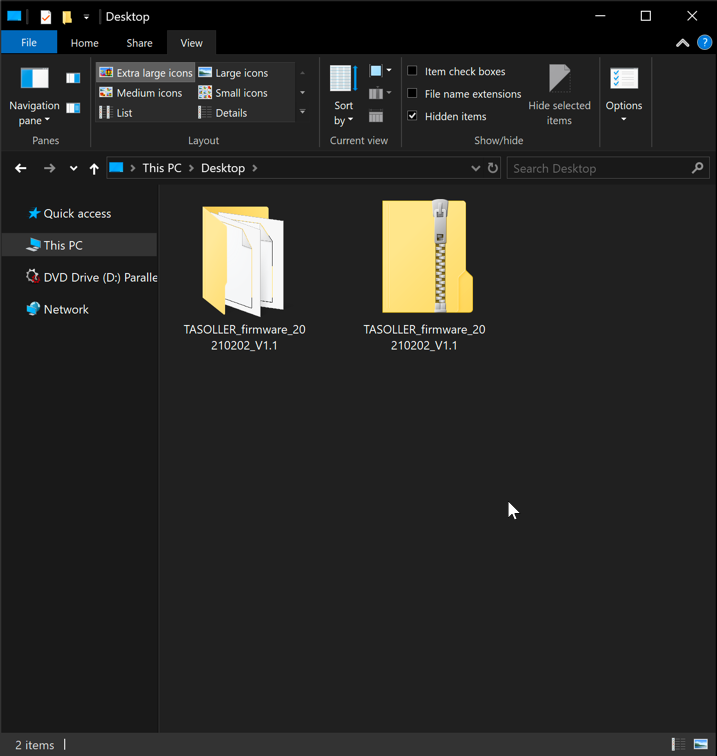
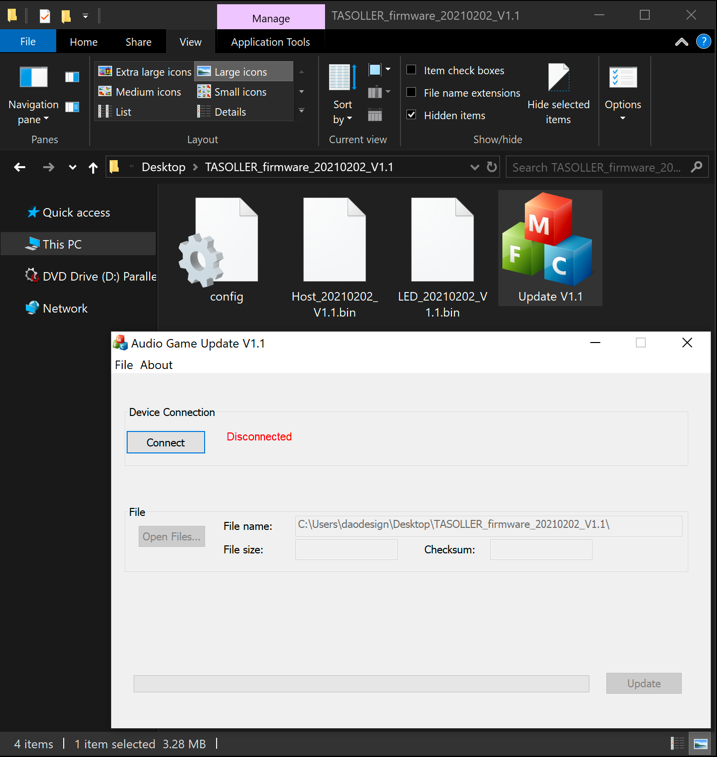
Download Firmware compressed files
compressed files name: TASOLLER_firmware_20210202_V1.1.zip
Release date:2021/2/2
version number:V1.1
Unzip the compressed files
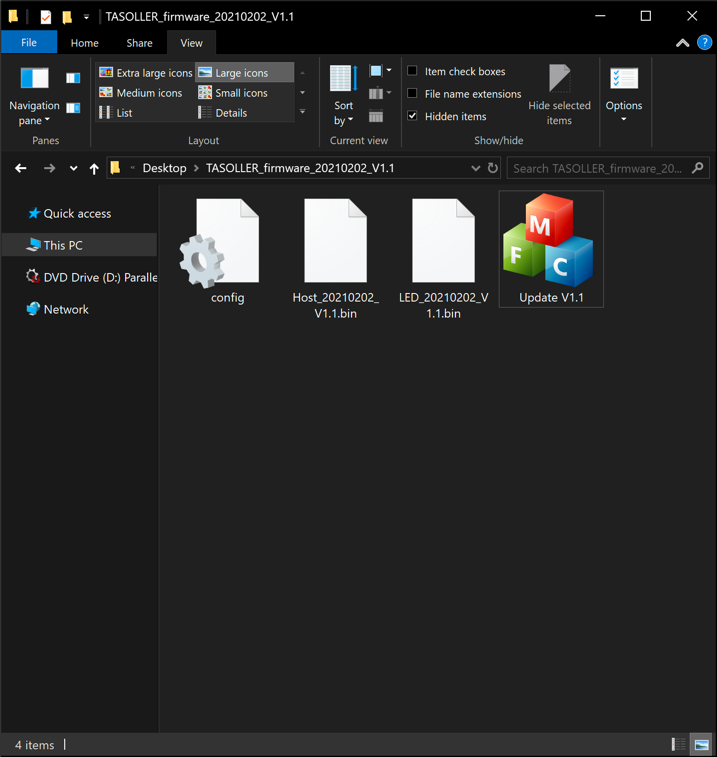
Make sure there are the following files in the compressed files:
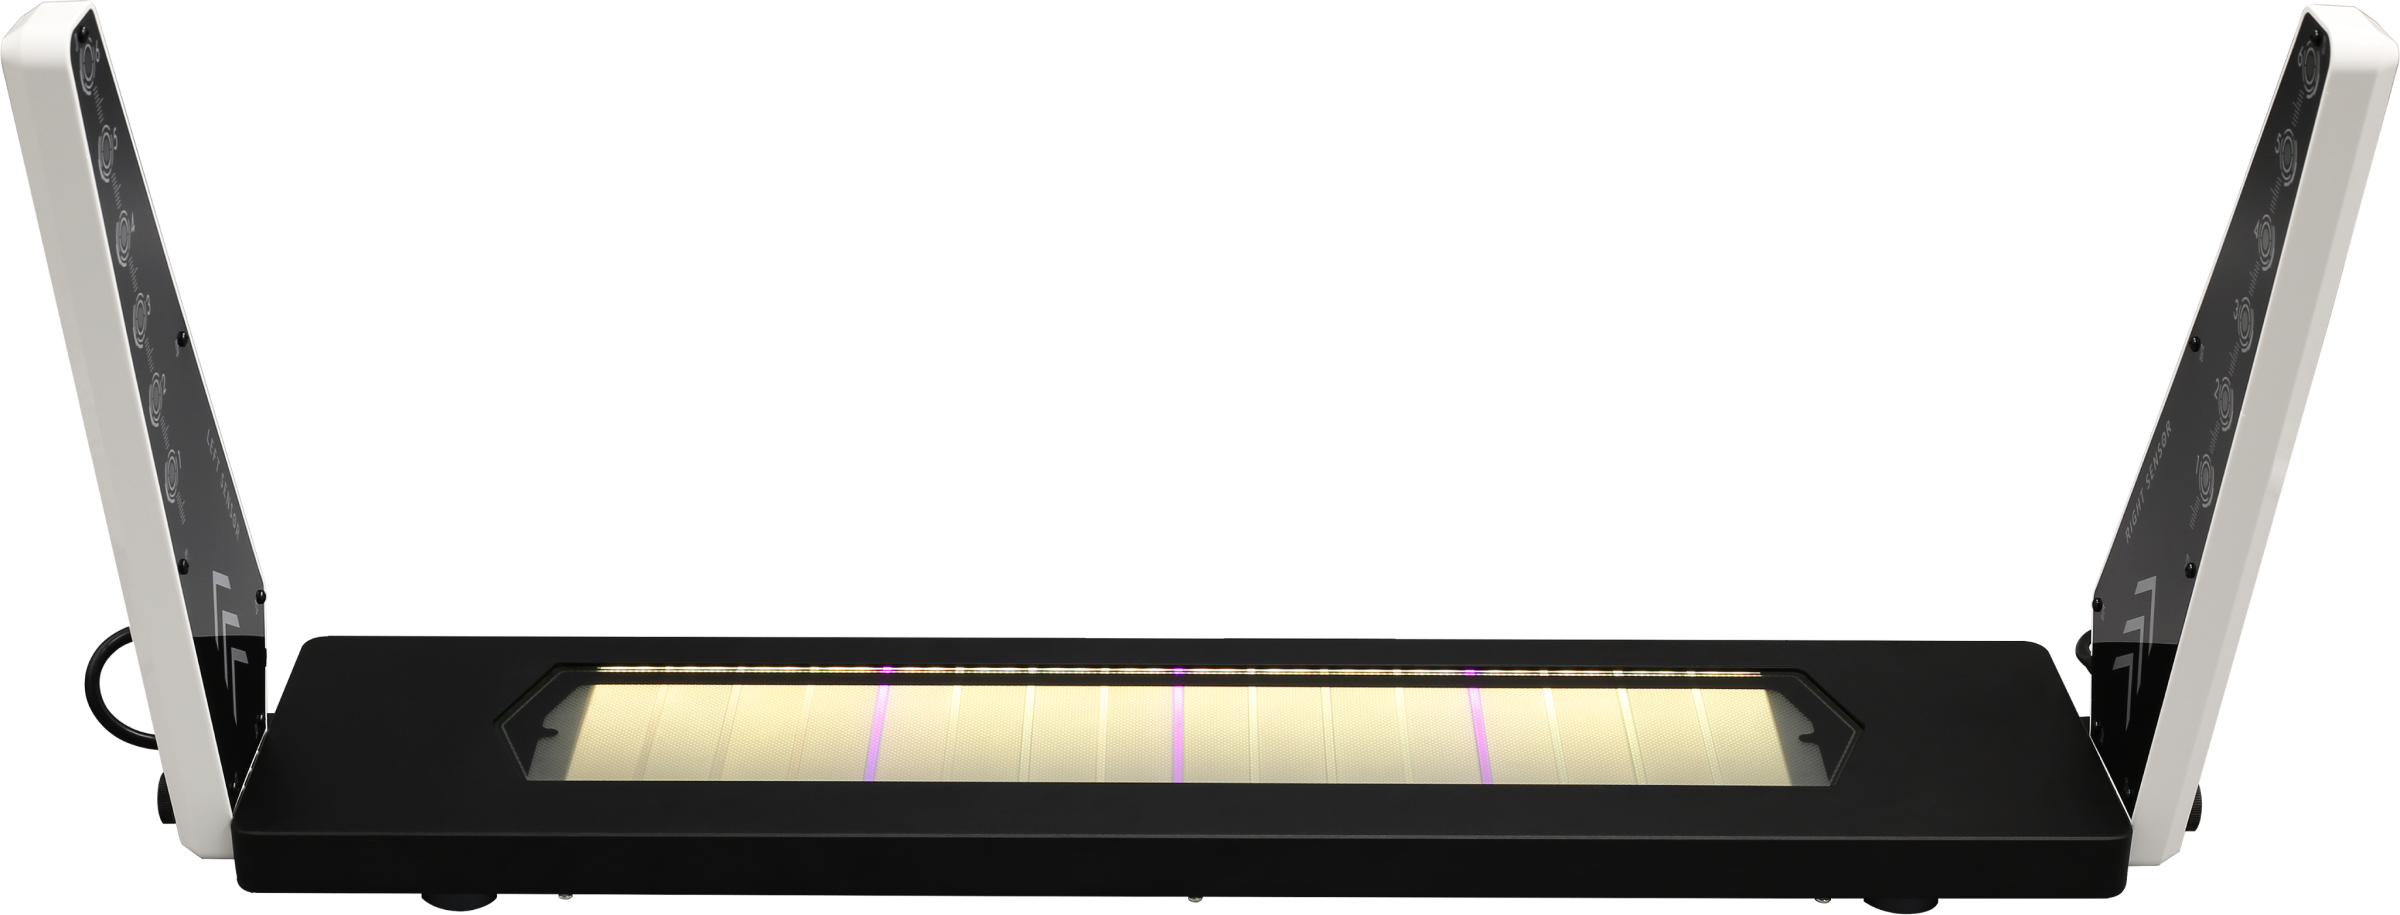
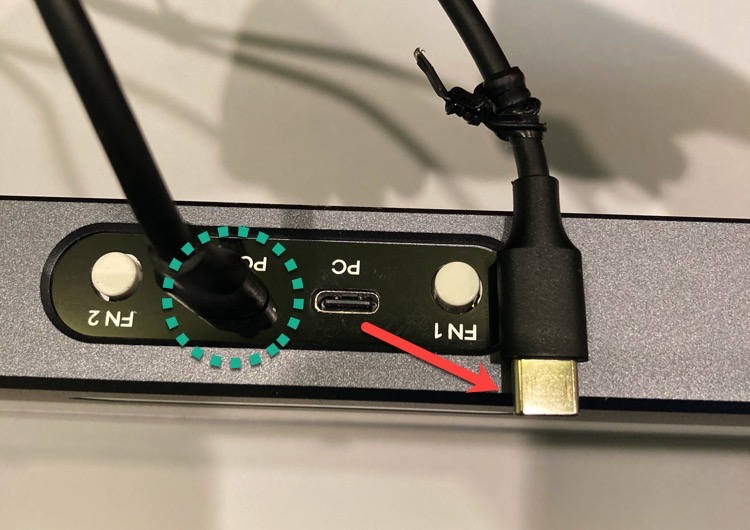
Disconnect the USB-C interface with "PC" written on TASOLLER;
PS: The USB-C interface with the word "POWER" on TASOLLER can be disconnected or disconnected without affecting the upgrade.
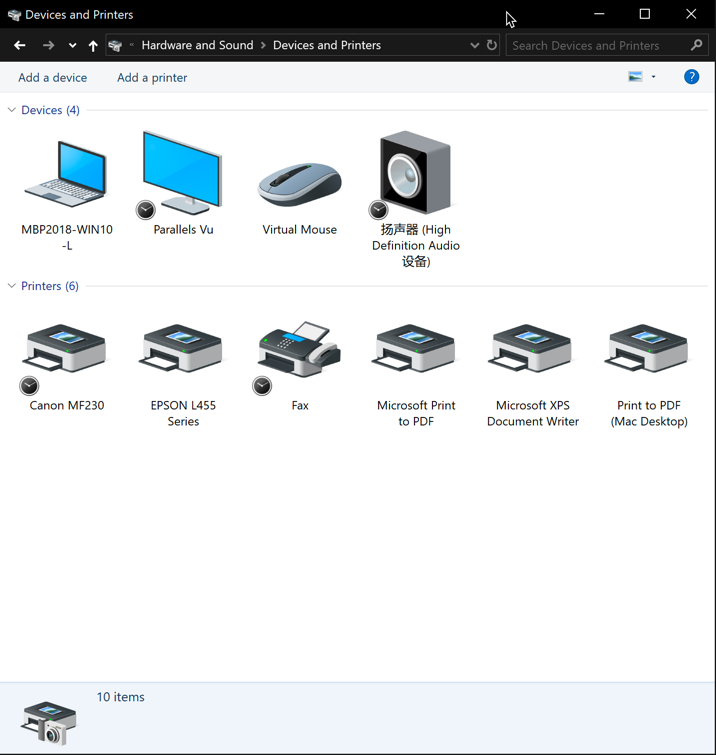
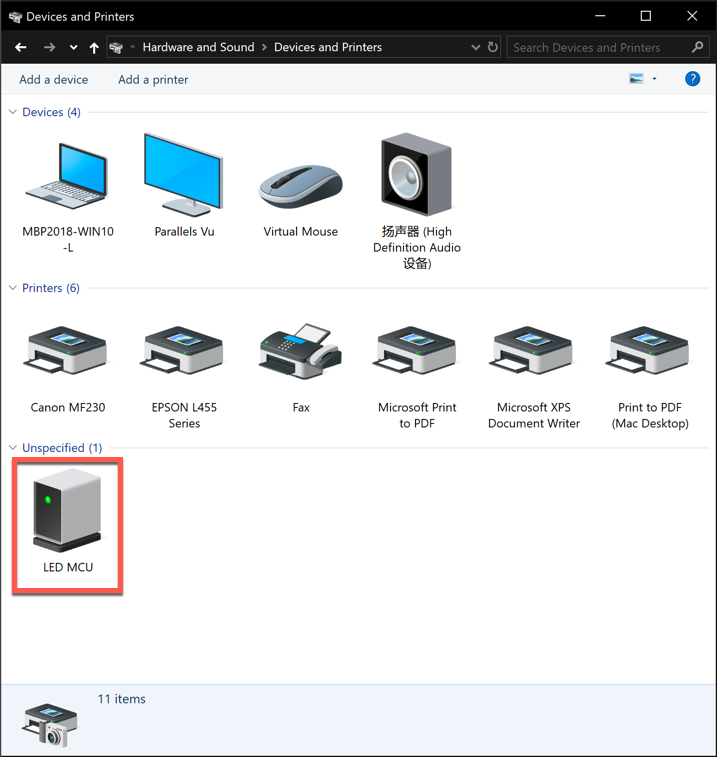
Open "Control Panel" and open " Devices and Printers".
(Note: For the convenience of confirmation, whether windows has recognized the upgrade status of TASOLLER)
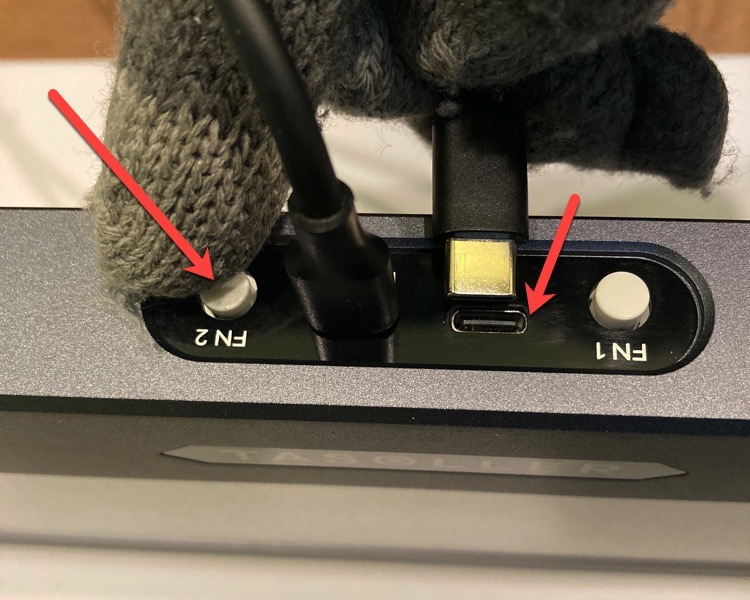
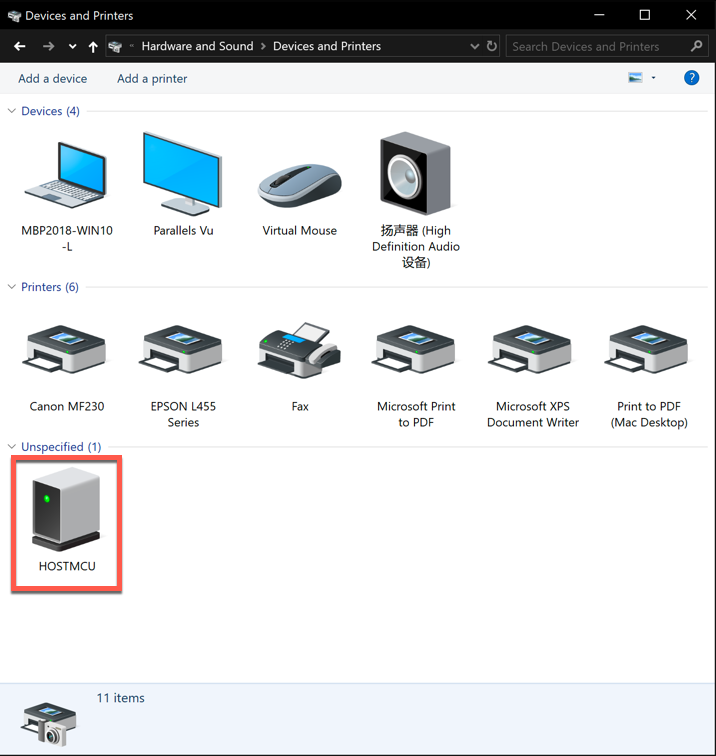
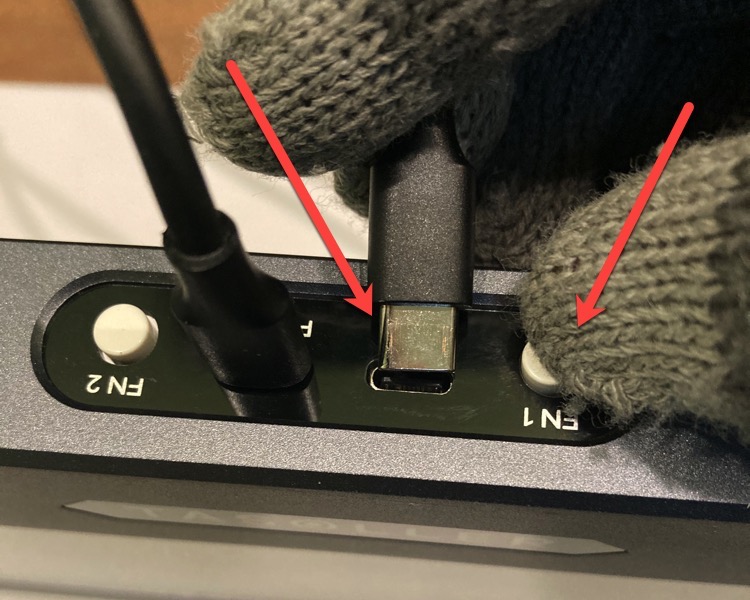
Press the FN2 button without letting go, and plug the USB-C cable into the USB-C port with the text "PC". After inserting the USB-C, don’t release FN2 until you see the HOSTMCU icon on the "Devices and Printers" page, then let go.
(Note: About FN2 is about to be pressed for about 1~2 seconds)
Open Update V1.1.exe

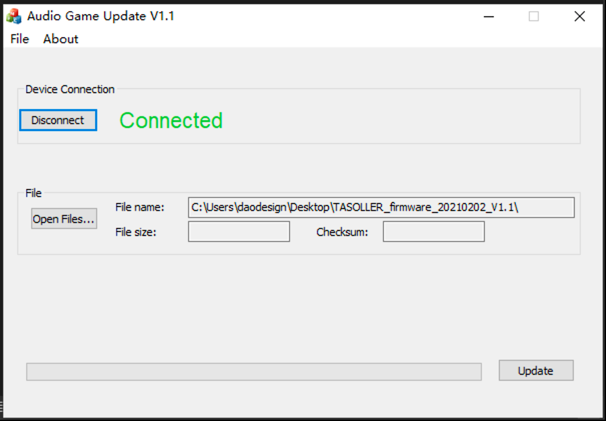
Click Connect button, if the connection is successful, Connect will turn green.

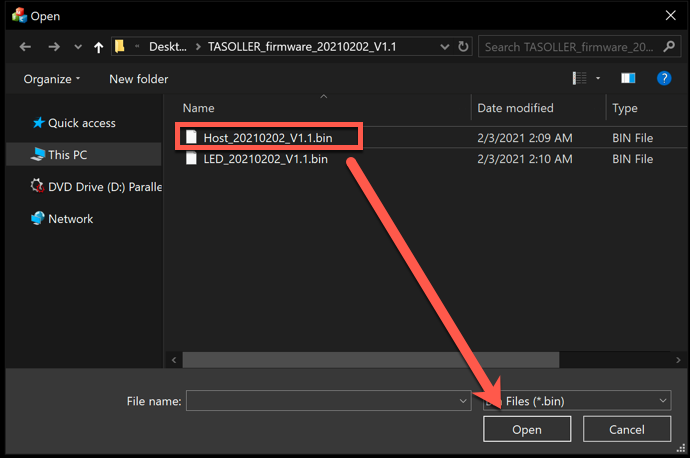
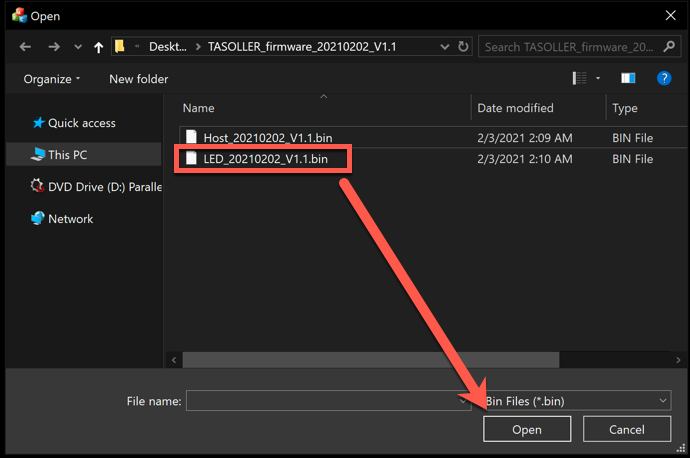
Click the Open Files… button and select the Host_20210202_V1.1.bin file in the directory
Click Update

After the progress bar is 100%.
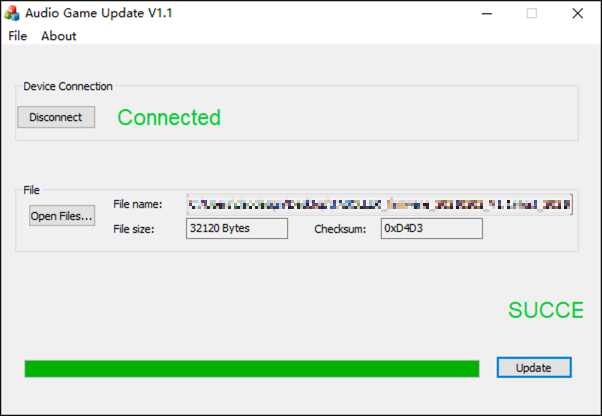
Complete the upgrade.10. Reinsert the USB-C.
Disconnect the USB-C interface with "PC" written on TASOLLER;
PS: The USB-C interface with the word "POWER" on TASOLLER can be disconnected or disconnected without affecting the upgrade.

Open "Control Panel" and open "Devices and Printers".
(Note: For the convenience of confirmation, whether windows has recognized the upgrade status of TASOLLER)

Press the FN1 button without letting go, and plug the USB-C cable into the USB-C port with the text "PC". After inserting the USB-C, do not release FN1 until you see the LED MCU icon on the "Devices and Printers" page, then let go.
(Note: About FN1 is about to be pressed for about 3~5 seconds)
Open Update V1.1exe
Click Connect button, if the connection is successful, Connect will turn green.
Click the Open Files… button and select the LED_20210202_V1.1.bin file in the directory
Click Update
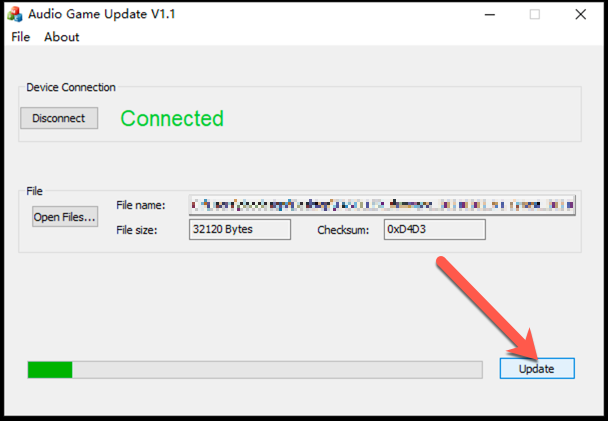
After the progress bar is 100%.

Complete the upgrade. Close the Update V1.1.exe software. Re-plug USB-C.
When upgrading the LED firmware, FN2 needs to be pressed for a longer time, there are 2 ways to determine;
Hear the sound of a new USB device recognized by windows;
In "Devices and Printers", you can see the LED device icon;
If in the case of FN2, the LED firmware was upgraded (the HOST firmware should have been upgraded), don't worry, just upgrade the HOST firmware again.
If in the case of FN1, the HOST firmware is upgraded (it should have upgraded the LED firmware), don't worry, just upgrade the LED firmware again.
If there are any problems during the upgrade. Close the Update V1.1.exe file, reopen it, and follow the steps to upgrade again.